Contributing to the ORMIR documentation
In the ORMIR community, we create and support community documentation, such as the ORMIR Code Guidelines that you are reading or the ORMIR Data Sharing Guidelines, as well as documentation of Python packages like ORMIR-MIDS and ORMIR-XCT. All our documentation websites are built using Jupyter Book and managed through GitHub.
Did you spot a typo, find outdated information, or notice something missing in the ORMIR documentation?
Here you will find a step-by-step guide designed to make contributing as straightforward as possible.
If you are unsure about any part of the process, are looking for something to contribute, or simply have a question, don’t hesitate to contact the project coordinators or email us at ormircommunity@gmail
The contributing process
Contributing to the ORMIR documentation involves three steps:
The following sections walk you through each step.
1. Setting up the website locally
Before you can edit the documentation, you need to set up the project on your computer so you can make and preview your changes locally before submitting them for review. This setup consists of four steps.
1.1 GitHub: Create an account
Make sure you have a GitHub account and have installed and signed in to either GitHub Desktop or Git. If you have not, follow the instructions here. If you already have a GitHub account and GitHub Desktop (or Git), you can proceed directly to the next step.
1.2 GitHub: Fork and clone the repository
First, fork (create your own copy of) the documentation repository to your own GitHub account. If you are unfamiliar with forking, find instructions here.
These are the current ORMIR documentation projects and their GitHub repositories:
| Project | GitHub repository |
|---|---|
| ORMIR Code Guidelines | https:// |
| ORMIR Data Sharing Guidelines | https:// |
| ORMIR-MIDS | https:// |
| ORMIR-XCT | https:// |
Next, clone (i.e. download) your fork to your computer. If you are unfamiliar with cloning repositories, follow the instructions here.
1.3. Jupyter Book: Install
The easiest way to install Jupyter Book is with pip install. Open a terminal (it can also be the terminal inside JupyterLab) and run:
pip install "jupyter-book>=2.0.0"If you prefer another installation method, go to the official Jupyter book installation documentation.
1.4. Jupyter Book: Build the website locally
Open a terminal and run the following commands to navigate to your local copy of the documentation repository and start the website locally:
cd <path-to-your-folder>
jupyter book start
Replace <path-to-your-folder> with the path to your local copy of the ORMIR documentation project.
You will see output similar to this:
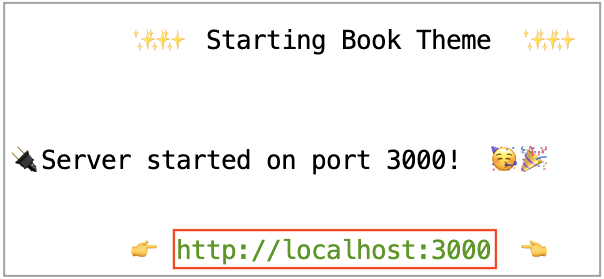
Click on https://localhost:3000. A new browser tab will open with the documentation site rendered locally. You are now ready to make your changes.
2. Making your changes
2.1 Repository content
An ORMIR documentation repository contains at least the following files:
myst.yml: the main configuration file for the documentation website. It defines the structure of the website, including the table of contents (ToC), which determines the hierarchy and order of the pages, as well as project metadata and build settings. If you would like to learn more about this file, see the Jupyter Book documentation.Markdown (
.md) and/or Jupyter Notebooks (.ipynb) files: these contain the content of the documentation. Each file typically corresponds to a page of the website. The homepage is alwaysindex.md.
2.2 Markdown and MyST markdown
ORMIR documentation uses MyST (Markedly Structured Text), an extension of Markdown developed for scientific and technical writing. In addition to standard Markdown (you can find the syntax rules here), MyST adds admonitions (notes, warnings, tips), cross-references, citations, equations, code-cell integration, figures, and other directives that make it possible to create rich and interactive documentation. A complete reference to MyST syntax can be found here.
2.3 Start contributing!
First, create a branch (a copy of the project edicated to a specific contribution, topic, or fix). If you are unfamiliar with creating a branch, find instructions here.
Then, open the file(s) you would like to edit (or create a new one) using your preferred editor, such as JupyterLab or Visual Studio Code. As you save your changes, Jupyter Book automatically rebuilds the affected pages.
3. Submitting your changes for review
Once you are done with your changes, commit (save your work), push (send the changes to your repository), and open a pull request (propose your changes). A maintainer will review your pull request asap!
🎉 Thank you for contributing to the ORMIR community! 🎉
Your contribution helps make musculoskeletal imaging research more open, reproducible, and accessible for everyone.